How to Create an Action for SAP systems
In GlobalAI, actions are reusable components that encapsulate specific functionalities or tasks within your workflows. Creating specialized actions allows you to tailor the automation capabilities to your specific needs, enabling you to streamline processes and improve efficiency. On this guide, you will learn how to create actions for SAP systems.
Create a SAP action
To create a SAP action, follow these steps:
- On the GlobalAI dashboard, select Workflows from the sidebar.
- On the Workflows screen, select the workflow you want to use.
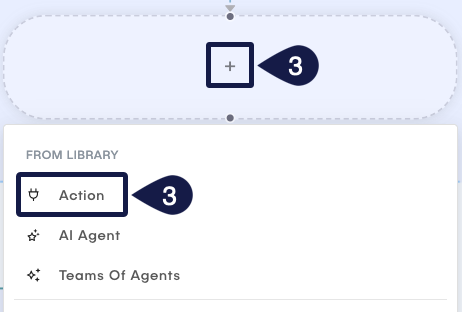
- On the Visual Editor, click the + button and select Action.
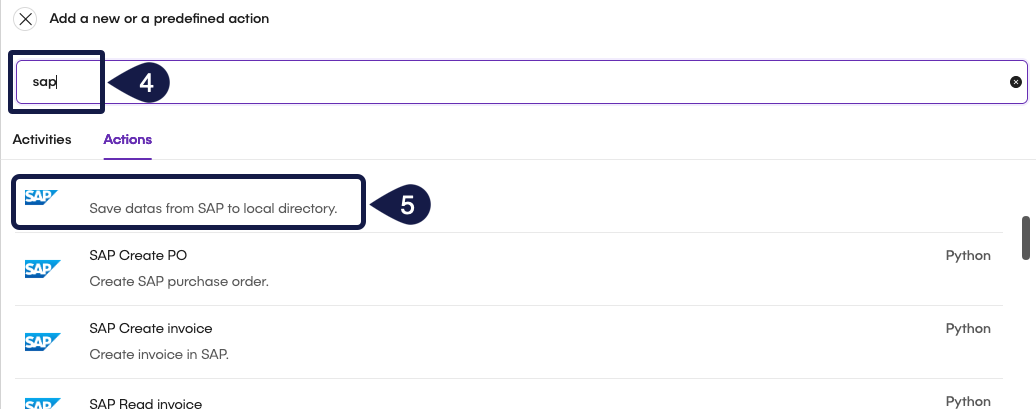
- Select the Actions tab and search for SAP actions using the search bar.
- Select the SAP action you want to use and click Add.
- Back on the Visual Editor, click on the node to open the action configuration panel.
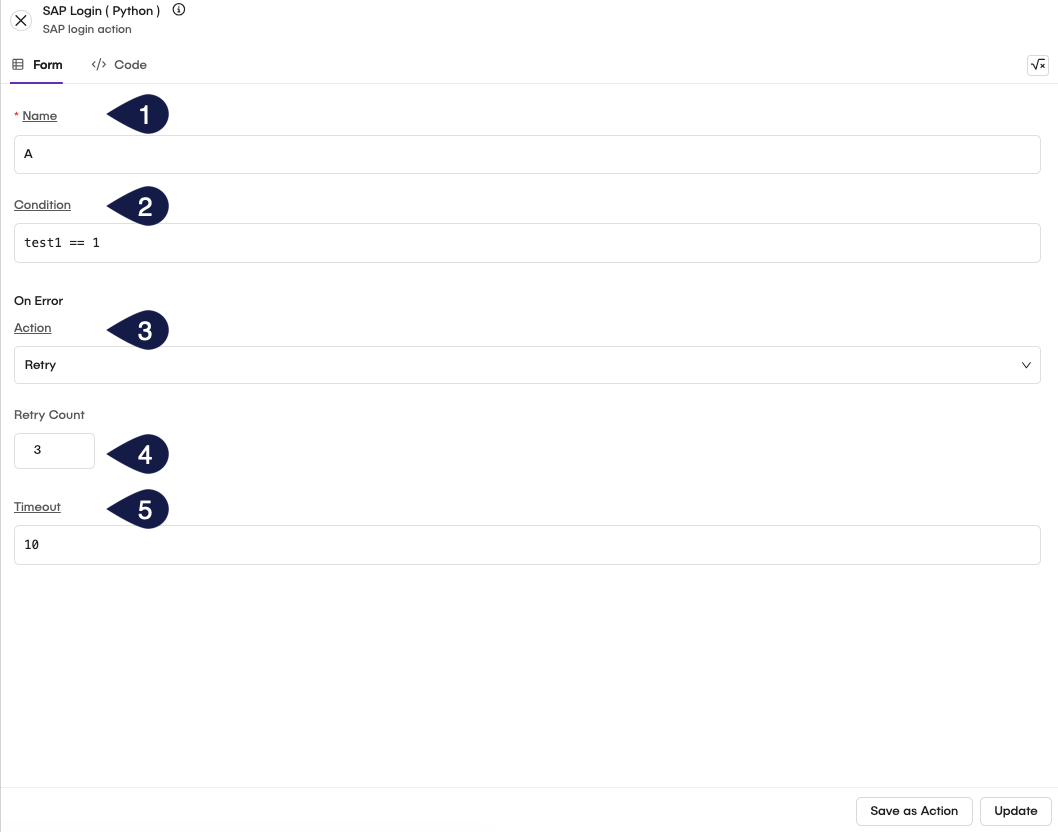
- For example, if you choose the SAP Login action, configure the following parameters:
- Name: Enter a name for the action.
- Condition: Enter a condition for the action.
- On Error: Enter an error handling strategy for the action.
- None: The workflow continues execution even if an error occurs.
- Retry: The workflow retries executing the node if an error occurs.
- Skip: The workflow skips this node if an error occurs.
- Timeout: Enter a timeout value for the action.
- If you choose the timeout, specify the value, in seconds, for the timeout.
- To configure the parameters for SAP login, enter the Code tab.
- On the Code tab, you will have the following code:
import requests
from requests.auth import HTTPBasicAuth

# Define the API endpoint and credentials
url = "${{ sap_url }}"
username = "${{ user }}"
password = "${{ password }}"

cookie = "wguOptionsFileEnc=2; sap-usercontext=sap-language=EN&sap-client=100;"

headers = {
    "Accept": "application/xml",
    "X-CSRF-Token": "Fetch",
    "Cookie": cookie
}

try:
    print("Authenticating...")
    # Make the request with authentication
    response = requests.get(url, auth=HTTPBasicAuth(username, password), headers=headers, verify=False, timeout=30)

    # Handle authentication response
    if response.status_code == 200:
        csrf_token = response.headers.get("x-csrf-token")
        print("Authentication successful!")
        print(f"CSRF Token: {csrf_token}")
    elif response.status_code == 401:
        print("Authentication failed. Check username and password.")
    elif response.status_code == 403:
        print("Access forbidden. Check permissions.")
    else:
        print(f"Unexpected error. Status Code: {response.status_code}")

except requests.exceptions.RequestException as e:
    print(f"Error during authentication: {e}")
- To configure the SAP login, provide the following information:
${{ sap_url }}: Enter the URL of the SAP system.${{ user }}: Enter the username for the SAP system.${{ password }}: Enter the password for the SAP system.
- Click on Update to save the configuration or Save as Action to save as a new action.
To authenticate with the SAP system, you must provide all variables correctly, ensuring that the address and credentials are valid. If you encounter issues, check the SAP system logs for more information. It is recommended to define all variables using environment variables.
Related articles
Now that you have configured the SAP and databases actions, you can proceed to the next steps.
Understand Actions
Learn about actions within workflows and how to utilize them effectively in the Global AI platform.
How to Add Nodes to a Workflow
Understand the concept of Nodes in the Global AI platform, which are the fundamental building blocks for creating effective automations.
How to Create a Custom Action
Learn how to implement control flow mechanisms in your workflows for dynamic execution paths.